

Roasted Beetroot Sourdough
PREP TIME
12 hours
COOK TIME
2 hours
MAKES
two 900-g loaves
Ingredients
661 grams
all-purpose flour
189 grams
bread flour
95 grams
whole wheat flour
170 grams
beets (about 2 medium), roasted, cooled, and skinned
17 grams
fine sea salt
563 grams
water
175 grams
ripe sourdough levain
Ingredients
-
Mix-in preparation
Be sure to prepare the beets ahead of time to give them sufficient time to cool before mixing them into the dough. You can roast the beets up to a few days before you plan to bake, keep them in the refrigerator, or roast them first thing in the morning before making the five-hour levain for this recipe.
When preparing the beets, I chose to roast more than I thought I’d need for this recipe—I roasted four medium beets each time. This way, you’ll be sure you can cover the recipe, and you’ll also have extra for salads or a repeat bake.
Preheat your oven to 400°F (200°C) with an oven rack in the middle position. Cut the leafy tops off your beets, wash and scrub them thoroughly, and wrap each in aluminum foil. Place the wrapped beets in a roasting pan or on a baking sheet, and roast for about one hour. The beets are done when a knife slides easily into the center. It’s ok if you slightly overcook these beets, but don’t take them out until they are nice and soft.
Once cooked, take the beets out and let them cool to the touch. Then, skin and coarsely chop them. Weigh out 170g of the skinned beets and place the pieces into your blender. Add 50g water, taken from the total mixing water to the blender with the beets. Adding the water will help keep the blender running. Blend on medium-low until the beets pulverize into small pieces about the size of rice. Use a plastic spatula to scrape the sides if necessary.
Once blended, transfer to a bowl and cover until needed at the end of mixing. -
Make a levain (9:00 a.m.)
You can make this levain first thing in the morning when your sourdough starter is ripe. It will be ready to use in about five hours (which also gives you plenty of time to prepare and cool the beets, as described above).
In a medium-sized jar or mixing bowl, mix 35g all-purpose flour, 35g whole wheat flour, 70g warm water, and 35g of your ripe (when you would typically give it a refreshment) sourdough starter. Cover and let ferment for five hours. -
Autolyse the dough (1:30 p.m.)
Autolyse is a technique that can help reduce the amount of mixing needed for a recipe, but it also helps soften a dough and create extensibility. For this recipe, it’s helpful because it means less time handling the beet juice.
Add the all-purpose flour, bread flour, whole wheat flour, and 513g water (remember, 50g was used to blend the beets) to a mixing bowl. Mix everything by hand until no dry bits of flour remain. Cover the bowl with an airtight reusable cover and let the mixture rest for 30 minutes. -
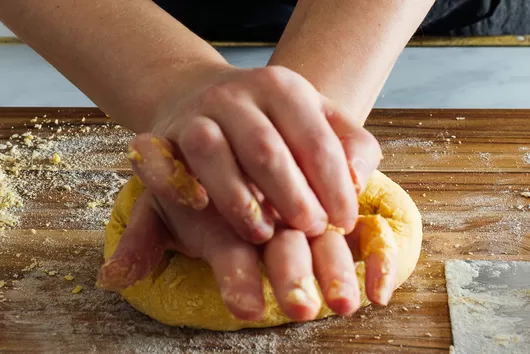
Mix the dough (2:00 p.m.)
After the 30-minute autolyse, uncover your mixing bowl, add the liquid levain, sprinkle on the salt, and add the blended beets. With wet hands, pinch and fold the dough over itself repeatedly to incorporate the salt and the beets. The dough will break apart as your mixing; this is ok, keep mixing and folding until it comes back together.
Then, stretch the dough up on one side and fold it over to the other, rotate the bowl some, and perform another fold. Continue to perform these folds for 2 to 3 minutes, turn the bowl a bit after each set, and strengthen the dough. At the end of mixing, the dough should be cohesive yet still shaggy and sticky. This is ok, we will continue to strengthen the dough through stretch and folds during bulk fermentation. Transfer the dough to another bowl or container for bulk fermentation. -
Bulk ferment the dough (2:15 p.m. to 6:15 p.m.)
Cover the dough and let it rise at room temperature (72-74°F) for a total of four hours. During this time, you’ll give the dough three sets of “stretch and folds” to give it additional strength. Set a timer for 30 minutes and let the dough rest, covered. After 30 minutes, give the dough its first set of stretch and folds.
For each set, use slightly wet hands to grab the dough farthest from you in the container, stretch it up and over to the side nearest you. Then, grab the dough on the side nearest you and stretch it back up and over to the farthest side of the container. Repeat two more folds, one at the right side of the container and one at the left.—you’ll now have a folded up square in the container. Let the dough rest, again covered and at room temperature, for 30 minutes, stretching and folding again. Repeat this process two more times for three total sets. After the third set, let the dough rest, covered, for the remaining time in bulk fermentation. -
Pre-shape the dough (6:15 p.m.)
After three hours, your dough should have smoothed out and risen in the bulk fermentation container. This isn’t a super active dough, but it should show signs of fermentation: a bubble or two here and there, a smoother texture, and if you tug on the dough, it’ll feel stronger and cohesive.
Gently scrape out your dough to a clean, unfloured work surface and divide it directly in half. Using a bench scraper and your other hand (floured or wet with water), preshape each half of the dough into a loose round. Let the rounds rest, uncovered and at room temperature, for 30 minutes. -
Shape the dough (6:45 p.m.)
After 30 minutes, lightly flour your work surface and the tops of the dough. Using a bench scraper and a floured hand, flip one of the rested rounds over to the floured work surface and shape it into a boule or batard (oblong) shape.
To shape as a boule, fold the bottom one-third of the dough up to the middle. Then, fold the left side up and over to the center, and finally, repeat for the right side. Finally, fold the top up and over to the bottom of the dough, forming a dough shape that resembles a folded-up mailing envelope. Flip the whole thing over so the seam is on the bottom and use two hands to drag the dough toward your body as your pinky fingers create tension in the dough against the work surface. If the dough needs further tightening, rotate the round as you push it away from you, and drag again. In the end, the dough should have a consistently smooth and taut surface.
Transfer each shaped round, seam side up, to an 8” proofing basket or clean kitchen bowl. I highly recommend lining your basket or bowl with a washable tea towel. Because the dough is bright red, some color will transfer to your towel, but it washes out easily. -
Proof the shaped dough (7:00 p.m. to 9:00 a.m., next day)
Cover the baskets with a reusable, breathable bag and place them into the refrigerator overnight (for at least 14 hours). During this time, the dough will proof and be ready to bake the next morning. -
Bake the loaves (9:00 a.m.)
The next morning, heat your oven to 450°F. Place an oven rack in the middle of the oven, and place a Dutch oven or combo cooker inside to heat inside the oven.
Remove one of the baskets with dough from the refrigerator and uncover. Cut a piece of parchment paper to cover the opening of the basket and place it on top. Place a pizza peel or large cutting board (or even an inverted baking sheet) on top of the paper and flip the entire stack over. You’ll now have your dough, seam side down, on the parchment paper on the pizza peel. Use a lame (baker’s razor blade) or scissors to score the top of the dough. Remove the Dutch oven from the oven and place on a cooling rack on the counter. Then, carefully slide the dough into the hot Dutch oven by dragging the parchment paper (it’s OK for the paper to bake with the dough inside the Dutch oven).
Place the pot back into the oven, cover with the lid, and bake at 450°F for 20 minutes. After 20 minutes, remove the top of the Dutch oven from the oven. Continue to bake for an additional 30 to 35 minutes, until the loaf is well colored and the internal temperature is around 206°F. Remove the pot from the oven, and transfer the baked loaf to a wire rack to cool. Return the Dutch oven to the oven, let it heat for 15 minutes, and repeat for the remaining loaf.
Let the loaves cool for 1 to 2 hours on the cooling rack before slicing.